Modifications
When I started this project I had to consider what I wanted in a finished car. There are lots of ways to go. Some people want a pure stock “trailer queen” that looks like it rolled off the assembly line yesterday, all parts being original “NOS” or something like that.
I wanted a reliable period car that was comfortable and drivable for daily commutes or trips and cruises. I also did not really have access to a lot of original parts. The term “original” for the 1960 model year varies, since there were many running changes from month to month during the that first year of production.
Everything that I restored I sandblasted before painting. I used plenty of paint, undercoating and soundproofing as well as bushings to create quiet ride.
This page sums up the basic changes or modifications I made to what would have been stock when my car came off the assembly line in late march of 1960. I am grateful to many members of the Corvair community and the Corvair Center for many ideas, suggestions, encouragement, and parts.
The details of my work over 30 months of part-time work are in the rest of the pages of this site.
Click pictures to enlarge
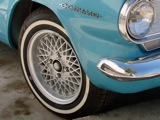
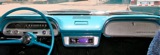
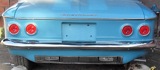
Paint: The original Tasco Turqoise would have been hard to come by so I chose a color that in some light is exact. In other light it changes considerably. The Chrysler Medium Aqua Metallic has much smaller metallic particles and many more of them, both aluminum and titanium, giving it nice tones in different light. For the top instead of the original plain white, I chose a bright white with a mist of pearl over it. Purists will notice that I chose to separate the colors at the base of the windshield post instead of the top.
Floor pans were replaced with donor steel from crashed cars. I added 3 coats of undercoating to them and the interior of the door skins.
Exterior mirrors: The car originally had no outside mirrors. I used a pair of 1961 mirrors.
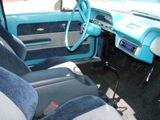
I reupholstered the Toyota seats with local materials, matching the rebuilt original rear fold-down seat and the home made door panels and Monza series arm rests. I also got a set of sun visors and upholstered them to match. The Chevrolet emblem embroidery was not stock. That was my idea, as was putting the “Corvair 700” script between the rear speakers.

I’ve used seat belts since I first installed them in 1961 in the family Chevy, so that was a must. I installed retracting shoulder belts from a Nissan in the front and Ford E350 lap belts in the rear. Seat belt hardware covers are made locally from fiberglass.
I covered the steering wheel with cork and leather, then took it to my local leather tanner to stain it to match the paint.
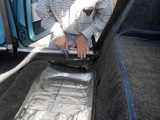
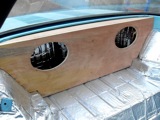
The interior is separated from the engine by two layers of Dynamat hoodliner and a layer of eDead (sandwiching the firewall), plus the speaker enclosure.
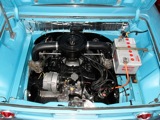
I had to replace the cylinders (had VW jugs) and the replacements are 62 or later bored to 0.20, so pistons and rings had to match. I used the original 95 hp cam and kept the low compression export heads. Motor number T0314YA. Head numbers are 6257688 and 6257689.
The valves were Nissan, so I replaced them with real Corvair stainless steel and new springs and guides.
Bearings are 0.10 with a modified oversize thrust bearing to take up the slack.
I used new lifters with decent pushrods sent from a friend, and a combination of the best rockers I could find.
The carburetors were rebuilt by Steve Goodman of Rear Engine Specialists in Colorado.
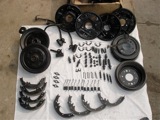
The starter is locally rebuilt with a new Bendix drive and a local solenoid, new nose cone with a home made bearing to fit the worn starter armature.
The Flywheel is Dale Engineering bolted, with a matching pressure plate and a locally resurfaced clutch disc.
The transmission is a correct 1960 3 speed rebuilt by Fisher's Transmission Inc. in Wichita, Ks.
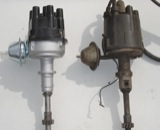
Spark plug wires are silicon.
I replaced the original generator (and mount) with an internally regulated alternator from a later series and replaced the mechanical fuel pump with an electrical pump at the tank, using a switch to turn it off if the oil pressure drops.
I added the aftermarket oil filter adapter so that I could use locally available oil filters.
The fuel sending unit is from a 56 Chevy, bent and shortened to match the design of the 60 sending unit and calibrated to match the tank capacity.
The majority of the parts I purchased from Corvair Underground and Clark's Corvair Parts

Each of the three interior electrical outlets is fused for 20 amps, giving me capacity to plug in my refrigerator, heaters, etc. for traveling.